Welcome back to my series on using Postman with Jamf Pro. If you haven’t checked out the previous posts, or you’ve never used Postman with the Jamf Pro API, you may want to go read through these:
Using Postman for Jamf Pro API Testing – Part 1: The Basics
Using Postman for Jamf Pro API Testing – Part 2: Creating And Updating Policies
Using Postman with Jamf Pro Part 3: Computer Groups
Today we’re going to dive a little deeper into the use of variables and the Runner feature in Postman. We touched briefly on variables in Part 2 when we discussed the use of variables to set the ID of a policy.
Just like in computer programming, we can leverage variables in Postman to store data that we need to re-use. We saw this in Part 1 when we setup our environment variables to store username, password, and URL, and again in Part 2 where we were able to set the ID of a policy using a variable and a Pre-request script.
Runner
To me, the real power of Postman is the Collection Runner function. A Collection Runner allows you to run a sequence of API commands in a specific order. It also allows you to feed values into those commands using the variables that we talked about in Part 2. For example, if you needed to disable a group of policies, you could pass a CSV file with a list of policy IDs to a Collection Runner and allow it to send the necessary PUT commands. Let’s see how we can do this.
The first thing we want to do is create our API command that we want to run and save it to a collection. The reason we do this is so we can gather commands that are similar for use over and over again. To disable a policy you just need to pass the following XML using a PUT command:
<policy>
	<general>
		<enabled>false</enabled>
    </general>
</policy>
That’s all we need to send as a PUT to the policies API endpoint. So once we’ve edited a PUT command and saved it to our collection, we can create a CSV file that contains a list of policy numbers. You can use Excel, Numbers, or a code IDE like Visual Studio Code, to create the CSV file. It is important for the first cell, basically the header, to contain the variable that we are replacing. In this case we want to have it set to “id” since our variable is {{id}} (most Postman API commands from the Jamf collection use that variable for a policy ID). So our CSV file should look something like:
id
1
2
3
4
Obviously the numbers will be different based on which policy IDs you need to update. Save that CSV file somewhere on your system and then head back over to Postman.
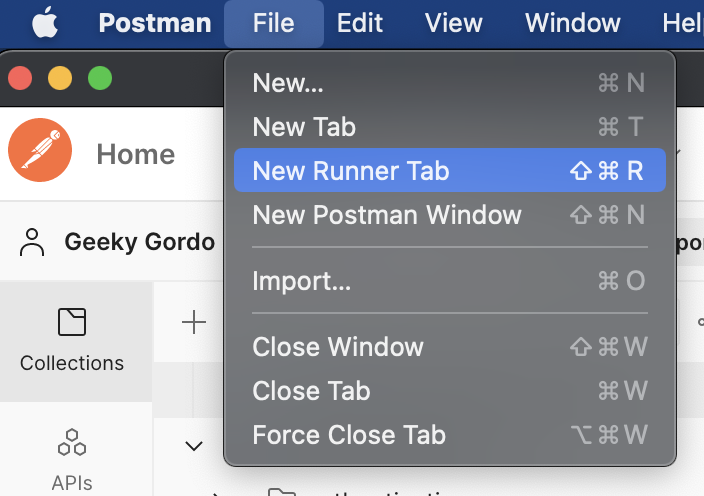
In Postman go under the File menu and choose “New Runner Tab” (or press Command-Shift-R).

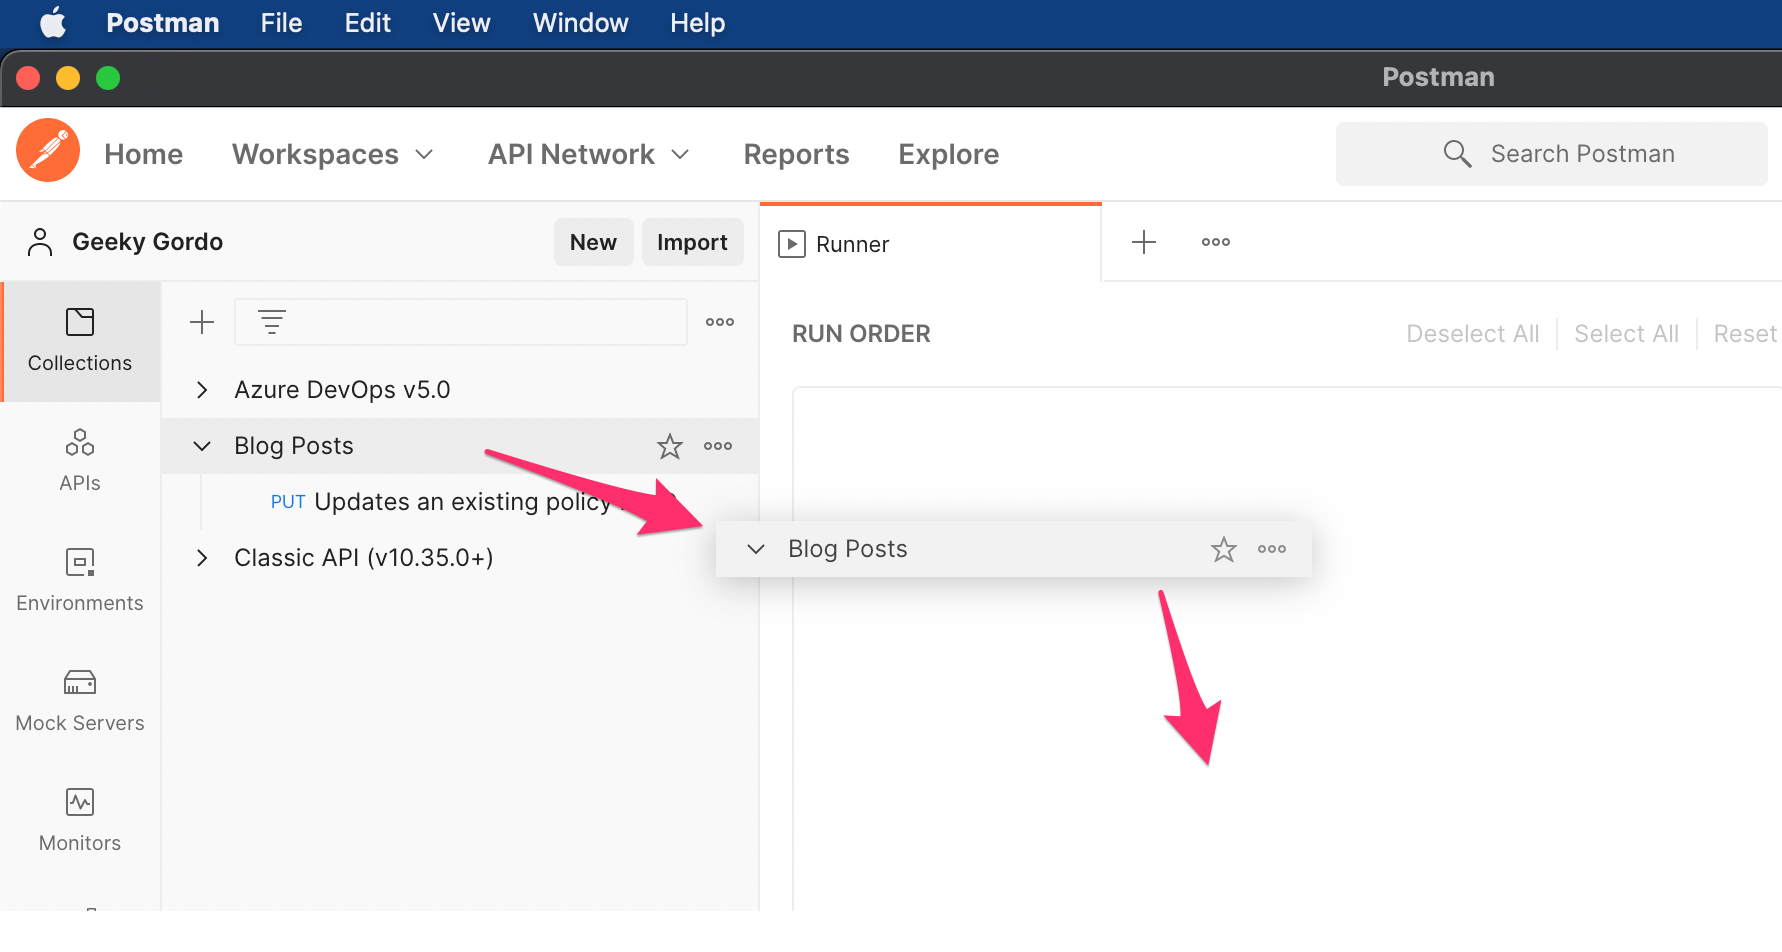
This will open a new tab named “Runner” in your Postman window. Locate the collection you saved your API command in and drag that into the Runner window.

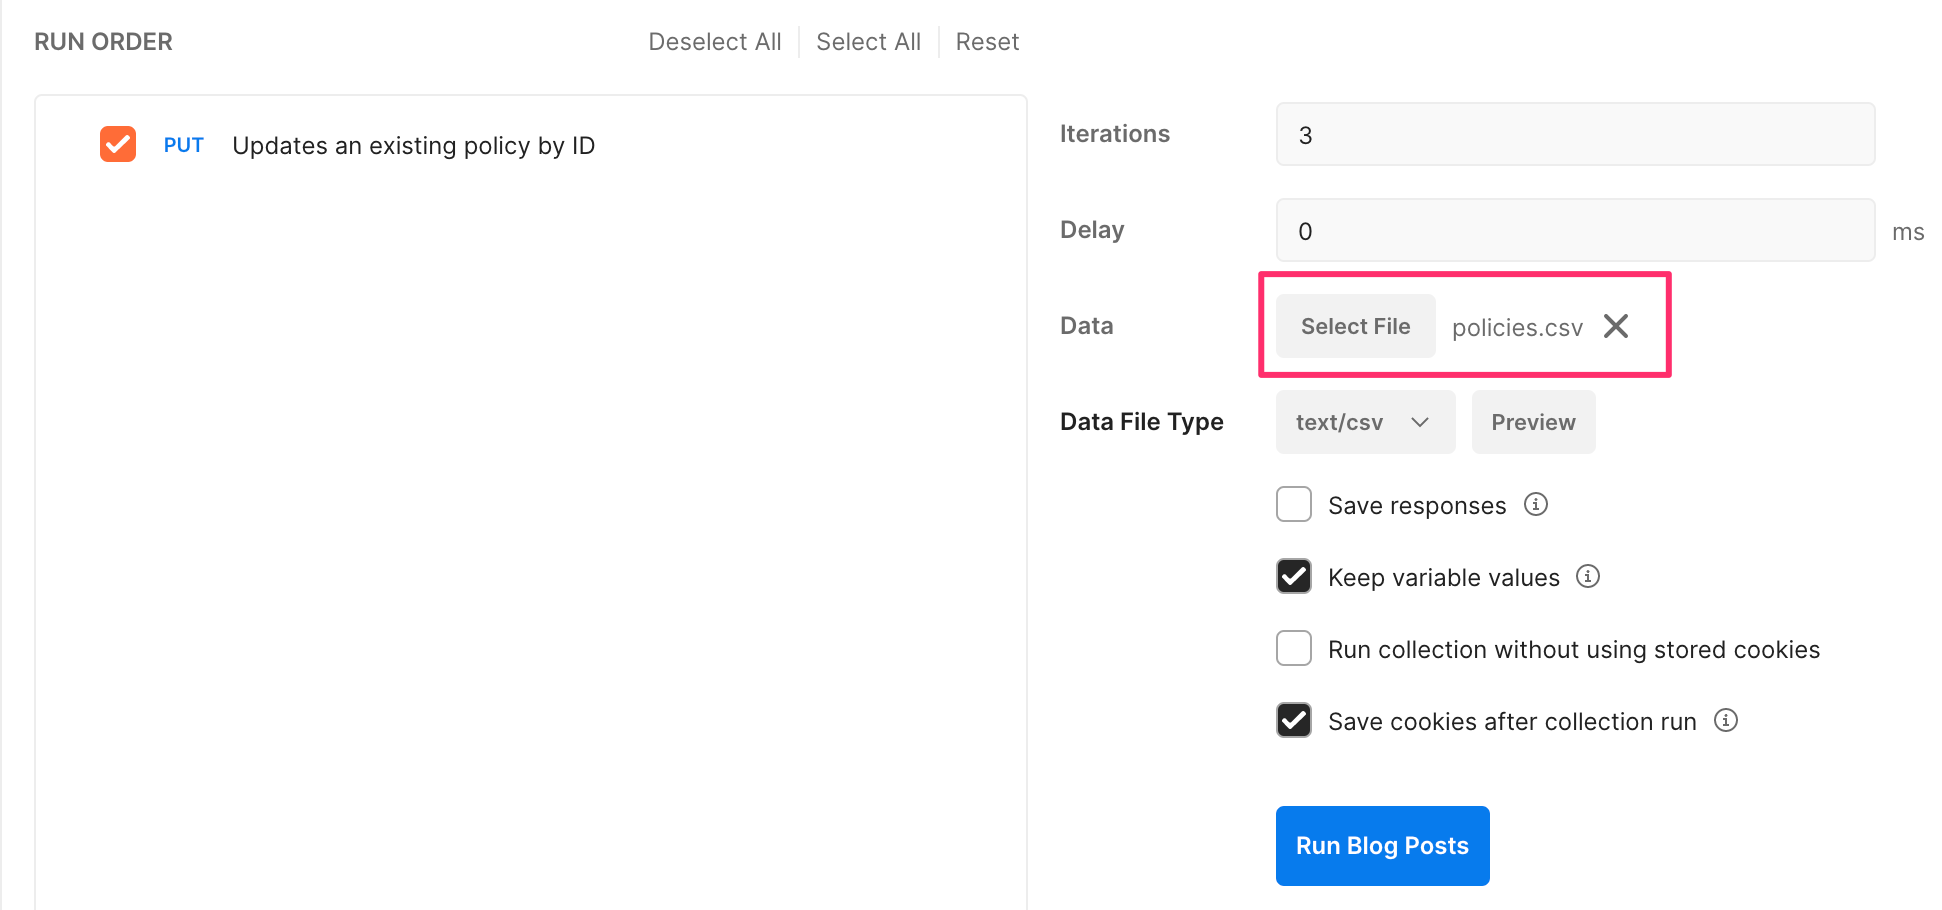
This will place all of the commands you have in that collection into the Runner tab with a checkmark, indicating they are “active”. If you have multiple commands but only want to run one, uncheck (or use the Deselect All link at the top of the Runner window) all of the commands you do not want to run.
Now that we have our command in the Runner tab, use the “Select File” button to the right and select the CSV file you created.

All we have to do now is click on the blue “Run” button and watch Postman do its thing. Once the Runner is done, you can go back to Jamf Pro and check the policies you put in the CSV file to see that they are now disabled. Pretty sweet, huh?
What about enabling a bunch of policies? You guessed it, just create a command that sets the <enabled></enabled> key to “TRUE” instead of “FALSE” and run it through a Runner.
You can use the Console in Postman to debug your commands and get feedback for what went right, or wrong.
Wrap Up
There’s plenty more you can do with Runners, like chaining API commands together and passing values between the calls, or creating more complicated policies or groups. In the next post I’m going to cover one use case for using Runners to create a series of policies.
2 responses to “Using Postman with Jamf Pro Part 4 – Variables & Runners”
[…] Using Postman with Jamf Pro Part 4 – Variables & Runners […]
[…] post I’m going to expand a little on our use of the Runner functionality which I covered in Part 4 and Part […]