In my previous post on adding printers via script I mentioned using lpoptions to identify the different option settings for a printer. Let’s open up Terminal and get started with identifying the options. You’ll need to have the printer already installed on the system, so if it isn’t installed go follow my previous post and get it installed.
First, let’s find the name of the printer. For that we will use lpstat -a:

Now that we know the name, Wayne_HOLD, let’s figure out what the options are that we can set. For that we’ll use lpoptions -p Wayne_HOLD -l. Now this list is way too much information to post here, so I’ll just cut it off at a few lines:
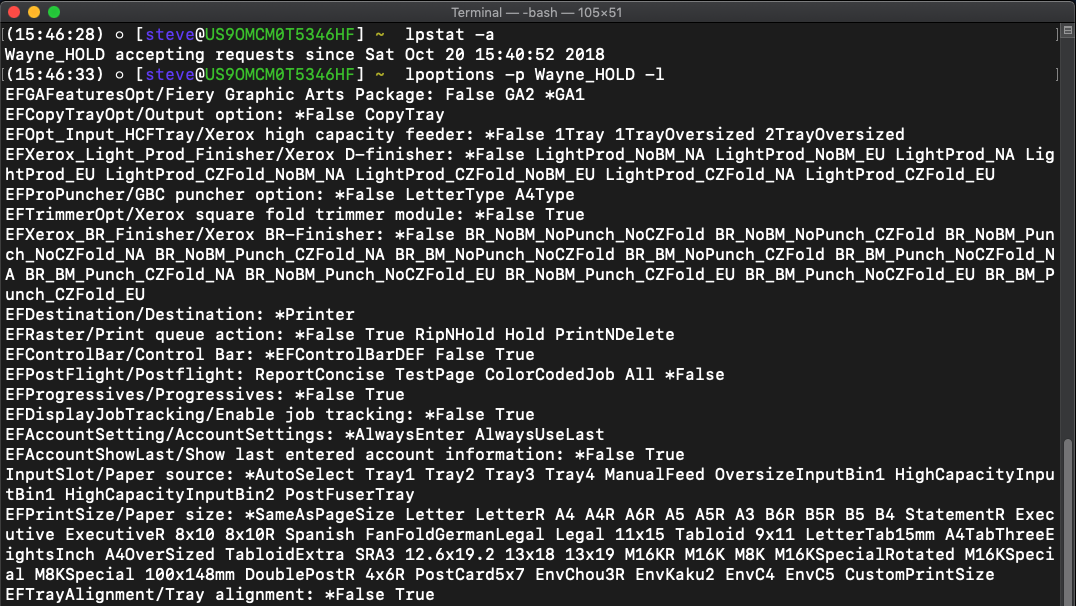
Wow, and there’s plenty more information beyond this. This part of setting the options can be a bit trial and error. We probably aren’t going to want to set everything, but we will want to add any options like the “Fiery Graphic Arts Package” that is installed, or the “Output option”, or perhaps the “Xerox high capacity feeder”.
One way we can figure out what option we need to set is by using grep along with the lpoptions command. For example, to know which option sets the “Fiery Graphic Arts Package” we might try this:
lpoptions -p Wayne_HOLD -l | grep -i "graphic arts"
This gives us the following:

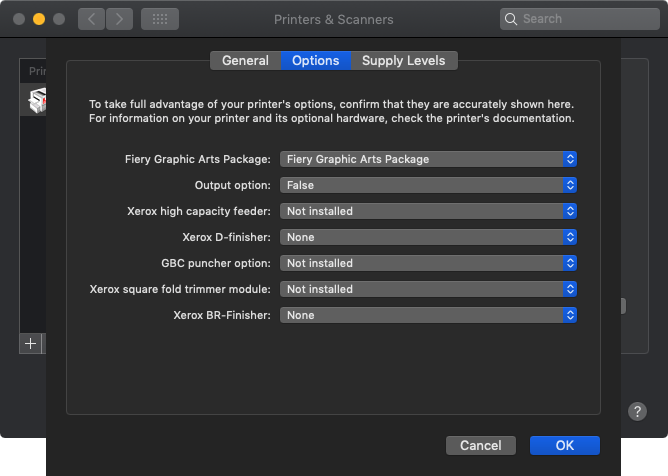
That’s great, but what does “GA2” and “GA1” mean? Open up the Options & Supplies window for the printer by going to System Preferences -> Printers & Scanners -> click on the printer and then click on the Options & Supplies button. For this printer, we can see that “GA1” is the “Fiery Graphics Arts Package”.
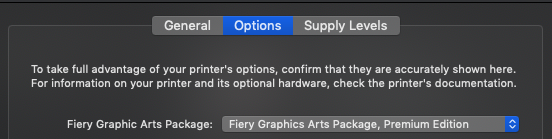
What happens when we change that in the GUI to:
This is what we see from Terminal:

So now we know that the “GA2” option is the “Fiery Graphics Arts Package, Premium Edition”.
For other settings we need to do some investigation in the Print pane when printing a document. For most printers we’ll want to see what the default view is in the Print dialog window and then make the change in the Terminal using lpoptions and finally go back to the Print dialog window to see what that change did.
In our case we want to set the Output option and the High Capacity Feeder option from their default settings:
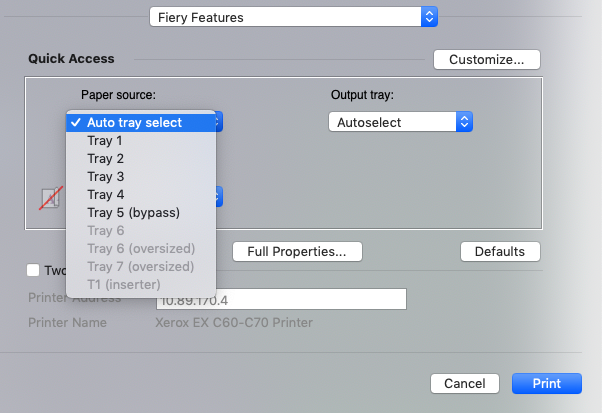
To use a high capacity paper source, and to put the output in a different tray:

Notice that in the second screen shot we now have Tray 6 available to us. We can acheive this using the lpadmin command to set the settings (note: the lpoptions command works most of the time, but I have far more success using lpadmin).

By figuring out which settings we want to use, we can now configure all of the options for a printer from a script. One more example would be setting a color printer to default to B&W and duplex print. This is often done as a cost savings measure.
lpa='/usr/sbin/lpadmin'
${lpa} -p CopyThat -E -o printer-is-shared=false -v lpd://10.89.170.5 \
-P "/Library/Printers/PPDs/Contents/Resources/Xerox WorkCentre 7855.gz"

${lpa} -p CopyThat -o Duplex=DuplexNoTumble -o XROutputColor=PrintAsGrayscale
I hope this has inspired you to dive further into setting up printers via script.
3 responses to “Using lpoptions To Identify Printer Options”
[…] figure out what those options are and to set them. Since that can be a daunting task, head over to this post about using lpoptions to identify the […]
You are the wind beneath my wings. This has been a Godsend. Thank you.
Thank you SO much for this!